The campaign began in September 1893 ("The Room Beyond"), where the PCs acted on behalf of Farr and Yeats to investigate the petition of Lord Arthur Pellgraine to join directly to the Inner Order. At this time, the GD has just opened its fourth temple. It has been active since March 1888, during which time some 170 members had been initiated. Presently there are about 120 active members. The vault of the London Temple ("Isis-Urania") is at #24-25 Clipstone Street, a few blocks south of Regents Park. For a few larger ceremonies, the most common venue is Mark Masons' Hall in Euston Road.
- 1893
- Sat, Sep 23 - Equinox meeting of GD
Mon, Sep 25 - 1st visit to Lord Pellgraine's estate: investigate room, take workbook
Tue, Sep 26 - 2nd visit to estate: fight the Thief of Form, burn down remains
Wed, Sep 27 - meeting with Farr
Fri, Sep 29 - Inspector Craig visits the four
Mon, Oct 2 - Joan Bayldon checked into asylum
Tue, Oct 3 - Meet, do tarot reading, telegram from Mathers
Wed, Oct 4 - Overhear Joan's session, GD meeting with Mathers
Thu, Oct 5 - Coneybeare meeting with Mathers & Northcote
Fri, Oct 13 - Horniman's party where Farr and Shankley summon Anstaria
Thu, Dec 21 - Winter Solstice GD meeting: Coneybeare joins and Woodsworth advances to 3=8
Sat, Dec 23 - Farr, Shankley, and Coneybeare again summon Anstaria
Sun, Dec 24 - They hear of the murders, and arrest Fotheringay-Phipps
Mon, Dec 25 - They find Joan in the East End
Thu, Dec 28 - Coneybeare completes the ankh in the evening
Fri, Dec 29 - They expose Joan and banish the hound- 1894
- Wed, Jan 3 - Fotheringay-Phipps is committed to the asylum for treatment
Sun, Jan 28 - Meeting of the GD to discuss impending doom
Fri, Feb 2 - Farr summons Anstaria with Coneybeare and Woodsworth
Sun, Feb 18 - Shankley awakens in a Paris boarding room
Fri, Feb 23 - (night) Dean Edwin Bristol killed; Shankley and Coneybeare arrested
Sat, Mar 3 - Norton's dinner meeting with M. Constantine; emergency meeting of GD
Fri, Mar 2 - Coneybeare released from jail
Tue, Mar 6 - Shankley awakens in the astral plane
Wed, Mar 7 - GD meeting with M. Constantine
Fri, Mar 9 - Travel by train to Brecknockshire, raise ghost that night
Sat, Mar 10 - Spend day in country, attacked by little people at night
Sun, Mar 11 - Perform banishment and seach caves
Mon, Mar 12 - Return by train to London
Fri, Mar 16 - Evening go into sewers to find the temple
Sat, Mar 17 - Return with Shankley's body
Fri, Apr 6 - Return to London with Arthur
Mon, Apr 9 - Norton reads letter and contacted by David Knightly
Wed, Apr 11 - Norton and Woodsworth's interview with the Foreign Office
Thu, Apr 12 - Norton shot, Howard captured
Fri, Apr 13 - Coneybeare receives Prynn original, in night break onto clay pits and Woodsworth killed
Sat, Apr 14 - Arthur raises Woodsworth and later admits this to the group
Wed, Apr 18 - Interview clay pit workers
Fri, Apr 20 - GD meeting that first reveals Arthur
Sun, Apr 22 - Arthur's forces meet, including Woodsworth.
Mon, Apr 23 - Norton finds that the temple is now guarded
Tue, Apr 24 - Recruit Arthur and later Constantine to help kill Thursif
Thu, Apr 26 - GD meeting to recruit members for the plan
Sun, Apr 29 - Attempted hit on clay cult members
Mon, Apr 30 - Norton brings Berridge to the F.O.; heat wave started
Tue, May 1 - Find Berridge insane; Coneybeare introduced to the grail
Wed, May 2 - ....
Began on Saturday, September 23 of 1883. This evening is the Equinox Ceremony of the Golden Dawn -- the most extensive gatherings of all members of the temple in a large ceremony. They rent Mark Masons' hall for the event. Woodsworth and Shankley are in it. They divide into sections according to their ranks within the society. Members are promoted according to the bylaws, followed by the ritual itself. Afterwards, the two are secretly slipped notes by SSDD (aka Florence Farr), asking them to meet her the following evening. She also sends invitations to Mr. Coneybeare and Dr. Norton for the gathering.
At the gathering, she explained her dilemma. She knew of Coneybeare and Norton as friends of the group, and wanted their expertise. She had received an unusual request -- Lord Arthur Pellgraine had contacted William Yeats regarding membership in the Golden Dawn. However, he was not only a lord, but also claimed to have secret mystical knowledge for which he should be inducted as a member of the Inner Order. By the normal rules of the order, that was outrageous. If known, it would cause ripples that they had even considered it. However, Yeats and Farr felt that they should at least investigate the claim. They had done some research into his background, and discovered that his paternal grandmother had been committed to an asylum shortly before her death.
Thus, they wanted trusted friends of theirs to investigate the claim. Yeats was heavily engaged, and in any case did not want to accept Lord Pellgraine's demand that he come personally. Shankley was a confidant (and former lover) of Farr's, and well qualified to evaluate the occult value of Pellgraine's secrets. Woodsworth was a trusted confidant of GD founder Westcott. Because of the Pellgraine's history of madness, Farr also wanted the opinion of Dr. Norton. Lastly, she wanted Coneybeare's evaluation of the authenticity of the "secret documents" which he claimed to possess.
They met with Farr on Sunday morning, and spent the rest of the day doing research into Pellgraine's background after sending a telegram arranging their visit for the following day. With his connections as coroner, Woodsworth was able to dig up the police and coroner's reports on the late Lord Thomas Pellgraine's death (Arthur's paternal grandfather). He had died under extremely suspicious circumstances -- supposedly mauled to death by dogs in the course of a botched robbery. However, when he examined the coroner's report carefully, Woodsworth was convinced that this was clearly false. Norton investigated the treatment of the grandmother, Andrea, who had been committed just after her husband's death in 1845.
The next day, they went to Pellgraine's estate in Loughton, 20 miles Northeast of London. One of the lord's carriages was waiting for them, and brought them to the estate. Lord Pellgraine was disappointed, having expected Yeats himself or more notables -- but he explained himself. His grandfather, Lord Thomas Pellgraine, had many occult secrets which were sealed up with his workroom after his death. The current Lord Pellgraine believed from extent papers that his grandfather had made a great discovery (which lead to his death). To show its authenticity, he broke open the sealed room only with them there. Inside, they found a pool of fresh blood on the floor amidst a small alchemical and magical workroom. He seemed to know little about it, and they studied the contents there.
Still at Lord Pellgraine's estate, the four investigated further. Woodsworth took samples of the blood, while Shankley studied the workbook. Shankley volunteered to stay in the room studying it and keeping an eye on the blood, as part of their observation. The workbook seemed to contain notes on the opening of a physical portal to the astral plane. (See Player's Aids.) It also mentions the names of several astral entities: Zorlith, Anstaria, Thursif, and Nevik. While Shankley worked, the others had dinner with Lord Pellgraine, during which they questioned him on his knowledge. They concluded that he had no knowledge or skill with the occult. Rather, he was relying on his status as lord, wealth, and the secret to let him be head. After dinner, they looked through some other papers of the estate -- including the diary of his grandmother, Andrea Pellgraine. This revealed more lurid details of the grandfather's life and death. (See Player's Aids.)
Lord Pellgraine then insisted that they leave. He said that they already had enough material to prove his claim, and that they should consult with their superiors regarding his petition. They argued, and convinced him to at least let them take the workbook and diary to authenticate them.
In the morning, strange things happened. Dr. Woodsworth found his sheets soaked in blood, and indeed blood oozing out unnaturally through his skin like sweat. Coneybeare woke to find his hands immaterial, unable to grasp things for a half-hour or so. Dr. Norton woke as normal, but then suffered two nasty bites -- as if from a lamprey-like creature. They were to meet Shankley for breakfast, but he did not show up. Going to his flat, they found his bed empty with his bedclothes still in it. Worried, they then proceeded to the Pellgraine estate to check on things there.
At Loughton, they rented a carriage to drive themselves to the estate. As they approached, they saw the body of a maid outside the house, having thrown herself out the second-story window. Her eyes had been bitten or sucked out, and other horrible wounds were around her exposed flesh. Inside at the foyer, they saw an arm sticking through the ceiling as if plastered around. Coneybeare walked to examine it, when suddenly it twitched and grasped as they heard a groan above. They raced upstairs to find the groundskeeper dead in the hall, and Woodsworth was attacked by a lamprey-like creature that was inside his body. In the master bedroom, they found a manservant dead, and were attacked by a spiked urchin-like creature that rolled out from under the bed. They soon pulled the bed aside to find Lord Pellgraine barely alive, half-embedded in the floor.
Coneybeare proceeded downstairs to find an axe, but he stopped by the formerly sealed workroom. He saw a light inside, and peeked in to see a glowing aura in the middle of the room and a human figure sprawled on the floor. It responded at first to the name "Thomas" which Coneybeare called it -- but later switched to speak more as the dead servant Robert. Talking to it as Robert, he said that Andrea loved him -- when suddenly he screamed in Thomas' voice "She does not!" and attacked him. In the light he seemed a misshapen man, and when one of his blows connected, his fist sprouted bone barbs that tore through Coneybeare's cheek into his jaw. The others came out, and firing wildly they wounded the thing. Coneybeare went into a murderous rage and chased after it downstairs. Seeing what seemed the body of a servant, he shot it to put it out of its misery -- but it then transformed into Robert and Thomas successively before melting.
Coneybeare then grabbed a halberd from the ceremonial arms over the fire, and rushed upstairs. The doctors could tell something was wrong and talked him down as he stalked towards them, though. They then went back to the workroom, and they could hear Shankley's voice. They called to him, and he followed their voice to materialize in the room. When they walked in, though, they were swarmed by dozens of small creatures like crustaceans which sliced at their faces. They fell back with a variety of wounds. Dr. Woodsworth had one crawl up his nose. Shankley was naked and had many small cuts over his body but all superficial.
They seemed to avoid the sunlight though. They then wrapped themselves in gauze and cloth, tossing in bodies first to distract the swarm. Inside, Shankley performed the pentagram ritual to seal off the portal. As it closed, all the creatures were sucked back through. They then brought the maid's body back inside and burned the house down. Driving away, they concocted a story that they had had a carriage accident and run afoul of a hornet's nest -- never having visited the Lord's estate.
They met with Farr the following day. She saw their beaten condition and had just then heard of what happened to Lord Pellgraine. Struck with guilt, she asked few questions at the time -- simply confirming that what happened would not reflect well on Lord Pellgraine and that no further mention should be made of it. Also, Coneybeare researched more on the names from the workbook -- he found three of them cited in an early Arthurian text.
We began with going back over what happened to Shankley. He awoke to find himself falling through his bed, the floor, and the basement into darkness. There he eventually heard an alien voice in his head. It was seemingly ancient and inhuman, saying that it had been asleep. It answered little to him, but upon hearing that he was human asked if he was Briton, Saxon, or Pict. Simply to get him to leave, it directed him towards the portal. He walked for three hours within the astral plane, slowly realizing what it was, before he got to the portal in the Room Beyond.
He continued to study Thomas Pellgraine's workbook after the incident. Therein, he found the basis for two spells: "Aether Portal" which opens a portal such as they found, and "The Taking and the Keeping" which might more prosaically be called Summon/Bind Astral Parasite. He also had a few conclusions regarding what happened. First of all, Thomas was working from some other original source which he copied from in early parts of the workbook. Second, the disaster which happened came about due to the stranding and torture of Robert in the astral plane -- followed by incompletely closing the portal which trapped what remained of him in it. Thus, the creature remained there bleeding for decades. The pain and blood drew many more parasites to the spot, which poured through later.
In the days following, the four were visited by an Inspector John Craig of Scotland Yard. He questioned them about their alibi, but also indirectly revealed bits of his own lines. He apparently had some interest in the maid, and some connection to Rochester. Coneybeare drew out that he was something of a believer in the occult -- after he mentioned the names Thursif and Nevik, which Coneybeare explained to him.
On Friday, this became somewhat clear when Joan Bayldon was admitted to St. Agatha's asylum. She was put in the care of Dr. Fotheringay-Phipps, a collegue of Dr. Norton, by Reverend Edwin Bristol -- the vicar of her parish in Rochester. Dr. Norton spoke with the reverend. Joan was the twin sister of Pellgraine's maid, Janice Bayldon, and had a terrible vision at the time of her death on Tuesday morning. She confessed it to Rev. Bristol later, but continued into a total breakdown over the next few days.
Over the weekend, Shankley showed Farr the workbook, and attemped the Aether Portal spell to take them both into the astral plane. He had a difficult time getting back, however, and they were both exhausted and horribly disoriented by the experience. He gave the workbook over to her at her request.
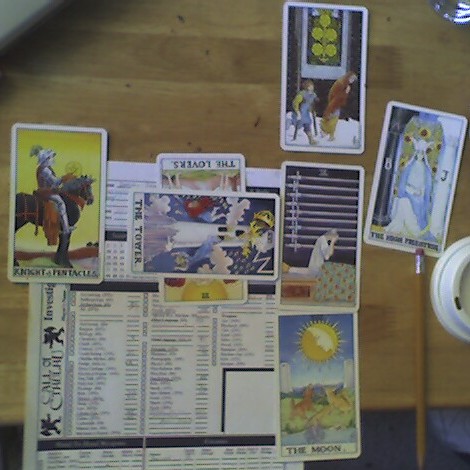
They met early the next week. Dr. Norton related what he had found regarding Joan. He had also overheard a session with Fotheringay-Phipps, but found little during that. Joan and Janice were orphans whose mother had been a prostitute, raised in a church orphanage. She clearly had a supernatural knowledge of her sister's death, but Fotheringay-Phipps was trying to connect it to her family life and guilt. They discussed plans, and Shankley did a tarot reading. In it, he saw Joan in grief caught between a disaster that befell ill-crossed lovers and the an unknown figure symbolized by the High Priestess. He also saw her between madness (symbolized by the four entities in the Moon) and the refuge of the church. On the other side, he saw what may be Inspector Craig as the Knight of Pentacles.
The following week, Mathers (founder of the Golden Dawn, known as DDCF) appeared in London -- asking Woodsworth and Shankley to meet with him on official GD business. Shankley at first suspected Farr of having told him, but was convinced that she knew nothing of this. At their meeting, Mathers claimed to have spoken to an astral entity named Anstaria which told him of the calamity -- and suggested that they were involved. Shankley spoke sharply back to him when he demanded work to help him probe the mystery, and left in a huff.
The next day, Mathers independently met for dinner with Coneybeare, bringing his wife Moina and his friend Randolph Northcote. Northcote was particularly obsessed with Arthurian myth and finding the "true Arthur" (as he would put it), and got along well with Coneybeare. They discussed many points of the development of the Arthur myth, and the greatness of the English tradition.
We begin with Dr. Norton and Dr. Woodsworth travelling out to Rochester to investigate Joan Bayldon, the twin sister of the maid who dies and a the patient of his collegue, Dr. Fotheringay-Phipps. He talked to Dean Edwin Bristol, who spoke of her home life growing up with her sister in the orphanage after their working-class mother died from a life of prostitution. He related that her sister Janice was more outgoing, and went into London for a well-paying job before becoming a maid for Lord Pellgraine. After checking his credentials as a doctor in the asylum, Dean Bristol let him into her apartment where he collected her letters. In the letters it became clear that Janice had been a higher-class prostitute before entering Lord Pellgraine's service -- and that Joan objected and begged her to quit.
Dr. Norton returned and over the next two weeks discussed the Bayldon case with her physician, Dr. Fotheringay-Phipps. Norton was dismissive of the Austrian techniques being used, and suggested regressive mesmerism to analyze the time of her sister's death which traumatized her. Fotheringay-Phipps agrees but feels it will take many weeks to try out what are to him brand-new techniques. Norton stops by to overhear their sessions every once in a while, but not much progress seems to be going and Joan's nervous condition seems worsening.
Mathers was staying in London for around two weeks, and he had demanded a written report from Shankley regarding what happened in the Pellgraine affair. Two days before his leaving was Friday the Thirteenth, and many of the Golden Dawn members went to a party held at the house of Annie Horniman -- a wealthy woman in the GD who had been funding Mathers' latest book project. Various members chatted. Shankley did not give the report Mathers asked for and refused to discuss it. Farr suggested to Shankley that they attempt a summoning to see what was done. She arranged to use the attic room for the attempt.
They first attempted to summon "Zorlith", but that fails. They next attempted to summon Anstaria, who appeared as a lithe, dark-haired woman -- dimly seen as though through mists. She said that Zorlith had been trapped and killed, and that she was concerned over what had done it. This was what she asked of Mathers. (Through context, they conclude that Zorlith was the monstrous "thief of form" which had appeared in Pellgraines' house.) She agreed to report to them, but asked a favor in return -- a list of all the people who were born in a certain county in Wales ("Brecknockshire") in a three month period. Shankley agreed to provide this.
The day after the party, Shankley consulted with the others present at the Pellgraine incident. Since Coneybeare had been the one who killed the Thief of Form, Zorlith, they agreed it was important to point the finger elsewhere. They concocted a somewhat more complex cover story for Mathers, for which they invented the racist character of an evil-sounding African mystic, M'Beke, whom Lord Pellgraine was connected with. Shankley writes this up and gives it to Mathers, and though he still hates Shankley's guts he seems to buy it.
Mathers then returned to France with the falsified report. Before leaving, he speaks with Coneybeare about an interest in the Fay Folk, aka the Little People, or in general the persistant legend of peoples living on the island of England prior to the first newcomers. He leaves after a brief chat. Over the following weeks, life goes on. Dr. Norton's treatment of his friends meets with some success. He also follows on the progress of Joan Bayldon. Dr. Fotheringay-Phipps is slowly coming up to speed on regressive mesmerism. Farr wants to contact Anstaria again -- but they want to bring Coneybeare into the ritual. Coneybeare agrees to join the GD, but they wait until the Winter Solstice meeting when his membership becomes official.
During this time, Shankley does collect the list of names -- those born in the Welsh county of "Brecknockshire" for a three month period in 1873 (twenty years ago). It takes a weekend trip out the Wales for the records, but the process is fairly straightforward.
On Thursday, December 21, the GD has it's Winter Solstice GD meeting. Coneybeare joins the ranks along with six others, and Woodsworth advances to the rank of Practicus (3=8). Two days later, Farr, Shankley, and Coneybeare again summon Anstaria. She accepts the list of names, and mentions that Mathers has been attempting to get the names of more beings such as herself -- but she refused him since he gave her false information. Coneybeare asks why she requested the names, and she replies that she is looking for what may be a relative of hers. She also hints a disturbance around, and explains that the "hounds" have been disturbed.
Disturbed at the news of these hounds, Shankley attempts a tarot reading, as follows:
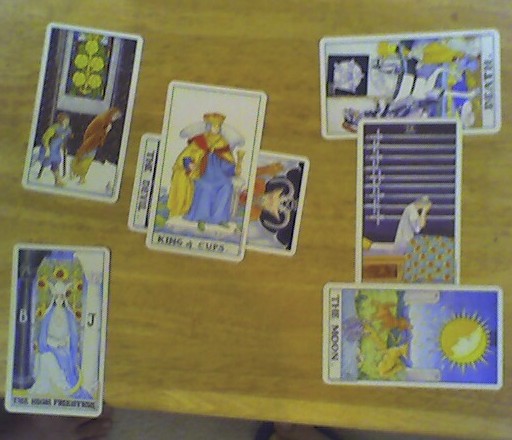
He feels that the woman at the center is still Joan -- and that now she is trapped between madness and death. Where before she was between the church and the high priestess, now the only influence was a new figure: a man of influence (the King of Cups), who wears a kind image to mask the evil within (the Devil).
We begin on the evening of December 23rd. Disturbed at the news of the hounds and Shankley's reading, the four gather at Norton's home late into the night to discuss their plans. Some time after midnight, there is a knock at the door which turns out to be Inspector Craig. He interrogates them a bit at their oddly-timed meeting, but eventually relents. He asks them about a set of symbols. As they question him, they find that he is investigating a series of murders with a possible occult connection. Apparently the killer carved the symbols into the flesh of a man murdered in the East End, and when a second victim turned up with a similar symbol carved in him, the Inspector immediately turned to his sources on the occult -- starting with Shankley.
Greatly concerned after hearing this, the four then head out in the middle of the night to the East End to investigate the scenes of the crimes. They find the scene of the first crime, and notice an odd look as if the scene were prepared -- but not piecing the details together. They talk to some of the prostitutes nearby, who presume them to be part of the local Vigilance Committee. The women say that a woman they called "Mad Annie" was probably the murderer, having talked to the police earlier. "Annie" is apparently a street walker as well, but none claim to know her. Shankley returns to the scene to open an astral gate and summon Anstaria there. She repeats that the hound is approaching, but describes it only in vague terms.
They go to the second murder scene, now quiet as it was now past three in the morning. They realized that the scenes have all corners beaten in or filled. They also remember that Joan Bayldon's mother was a prostitute named Anne. They are suspicious that Joan is connected to this, and return to their homes to catch a few hours of sleep before meeting at St. Agatha's Asylum at noon.
There, Dr. Norton goes to talk to Dr. Fotheringay-Phipps while the others wait in his office. Dr. F-P is quite happy to see Norton, and talks excitedly about breakthroughs which he has made. He explains that Norton's suggestion of regressive mesmerism was brilliant, and that by research he has found a formula to help regress a subject's mind into the past. He shows Norton the room with Billy Ashton, who has been physically transformed to a boneless crawling mass. Norton is horrified. Meanwhile, Shankley breaks into F-P's office by travelling through astral space, and the others are searching his papers. When Norton returns from his visit, they confer and subdue F-P, though he threatens them with a pistol drawn from his desk as their intentions become clear. The others grapple and chloroform him, then send a telegram to Inspector Craig to come help them.
We begin on the afternoon of December 24th, Christmas Eve, with the PCs gathered at the office of Dr. Fotheringay-Phipps, whom they have knocked unconscious. Inspector Craig has arrived at their request. Dr. Norton explains the abuses, and offers to show Craig his patient Billy. However, Billy is missing from his room, the door now open. However, Craig agrees to hold Dr. Fotheringay-Phipps on their word for the time being. The doctor recovers and Craig takes him into custody. They run into Dean Bristol as they are leaving, who has strong words once he learns that his ward Joan has escaped. While Craig is talking to him, F-P makes a desperate plea to Norton, offering him first credit on any papers. He also claims that he has personal notes with even more revolutionary ideas there, but that they would be useless to Norton without him to translate them. Norton ignores this, though, and Craig takes Fotheringay-Phipps into custody.
Coneybeare goes home, taking F-P's copy of Prynn's "Mysteries of the Worm" which seems the source of the Liao drug used for regression, and highly relevant to the problem they have at hand. Meanwhile, Norton finds the secret attic where F-P has his secret notes that he referred to, but finds that they are in code. The others are helping the asylum staff in the search for Billy. Woodsworth and Shankley find the orderly Rolf quivering in a corner nearly insane, and are accosted by two other orderlies who seem complicit with F-P's schemes. However, Shankley talks them out of a confrontation. They eventually find Billy in the walls and flush him out into an attic room. Shankley grapples with him disgustingly, and they stuff him in a trunk to be brought back down to his room.
In the evening of Christmas Eve, they head into the East End to search for Joan, where Woodsworth spots Dean Bristol also searching for her. They also run into a patrol of the Vigilance Committee, from whom they learn of a third murder. With the limited resources for the holiday, the body is not yet in the City morgue, but has been stored in a nearby school. Proceeding there, they meet with Inspector Craig who tells them the basics of this murder -- and also mentions that the City morgue was attacked by "anarchists" where the prior body was. Westcott (founder of the GD) was the coroner on the scene, and he was now hospitalized. Craig is now strongly suspicious of some sort of cult connected to these murders.
Proceeding to the body inside, Woodsworth is the first coroner on the scene. He begins to examine the body, but after ten minutes a keening sound rips through the area. The angles of the room distort and suddenly from the carved mark on the body, it flies apart into four pieces as the Hound appears. It is nothing like an animal or even terrestrial matter -- but rather a twisted distortion of angles, with six appendages that throws off a crackling aura that burns like acid. Forewarned by the baying, Woodsworth flees and escapes with Norton. Shankley was a few blocks away, and sees the Hound as it bursts through the brick wall.
Terrified, they confer at Coneybeare's home where they all spend the night. Coneybeare stays up late, fascinated by what he finds in the book. He also notices Norton who sleepwalks out the door to the King's Cross train station. Coneybeare wakes him there and brings him back. In the morning, Christmas day, they have a plan to construct the Crux Ansata from the book which should be able to banish the Hound. In the meantime, though, they must find Joan and keep her in a room with no angles.
Needing an ankh made from an unalloyed metal, Coneybeare and Woodsworth use their GD contact, an engineer and Inner Order disciple Allan Bennett, to find a metallurgist who would do this for them on Christmas Day. Meanwhile, Shankley and Norton meet with Inspector Craig at the asylum. With Craig's assistance, the eject the thug-like orderlies who worked with F-P, and prepare a room with plaster. However, they find that to cover their crimes, the orderlies burned Billy's body. Norton then retrieves Joan's letters and diary about her mother. Guided by this, they go to the East End and join up with Dean Bristol, eventually finding her under the round arch of a bridge. The drug having mostly worn off, she no longer thinks she is her mother Anne but is confused and distraught. They bring her to the asylum where they lock her in the angle-less room.
Taking several hurried days of research and enchanting, Coneybeare completes the ankh in the evening of Thursday, December 28. They then rest to confront it the following night. While sleeping, Shankley has a terrible nightmare. The voice he heard when he first dropped into the Astral Plane speaks again, with the keening of the Hound in the background. It hisses out, "My slumber is broken... Now all must pay!" He wakes up disturbed, but still joins the other three at the asylum. They place an angle-filled token at the end of the hall and take Joan out of her room. Within minutes, the Hound appears. Each of them put all their will into the ceremony of holding the ankh out, and it is barely enough. The hound is almost upon Coneybeare and his fingers holding the ankh are scarred by its acid-like aura, but it folds upon itself and vanishes.
We begin on December 29th in the aftermath of banishing the Hound. Over the next few days, Shankley is withdrawn but seemingly normal. Norton receives a telegram to meet with Inspector Craig at his club on the afternoon of New Year's Eve. He is concerned what to do about Fotheringay-Phipps, saying that there is little legal evidence to prosecute him for -- with Billy destroyed and the notes inconclusive. Although he has grave misgivings, in a private meeting, Norton agrees with Coneybeare and Woodsworth to inject a small dose of the Liao drug into F-P to make him appear insane for a review. Committed to St. Agatha's, Norton could then keep an eye on him.
Meanwhile, Woodsworth again visits his fellow coroner Westcott, who is still in the hospital after his attack. Westcott is still shaken, and want to alert the rest of the GD about the terrors which he has faced.
Norton arranges a hearing a few days later. Regressed to the 17th century, F-P is easily judged insane by the panel of three doctors, and committed to St. Agatha's in Norton's care. Norton then claims to have destroyed all the notes and the remainder of the drug, but secretly keeps many of the papers locked in his safe.
Meanwhile, Shankley has gone out of contact. On Friday, Coneybeare receives a letter from SSDD (Florence Farr), asking him to meet her to talk about Shankley and grave readings which she has seen "in the leaves". He brings Norton and Woodsworth, and they discuss the recent events. She has found further references to the name Thursif in a volume of unknown origin entitled "Monstres and Their Kynde".
Shortly thereafter, they agreed to again summon Anstaria. She reported that Thursif would awaken swiftly and destroy the land, that he would stir within the next several cycles and emerge within no more than twelve. Woodsworth asked her and clarified that these were lunar cycles, with a new perspective on waking "swiftly". She suggested that sacrificing many fallen warriors and virgin ladies might appease him, but did not hold out hope. She did suggest that they consult their priestesses, who would know more about what would work, but they informed her that they no longer had priestesses. She asked that they bring her cousin, Nathaniel Hardewick, to his birthplace in Brecknockshire, Wales to stay with his parents. She did not intend to stop Thursif, and respected his kind as her forebears.
During the remainder of January and into February, Coneybeare is researching a spell within Prynn's "Mysteries of the Worm" to call ghosts. He is also searching for the original of which he only has the English translation. Woodsworth spent time investigating clay sites within the greater London area, based on the reference that the Dragon Kings oracles were found in clay fed from underground streams. He found two which had bad reputations for spooky atmosphere and high turnover of workers. However, one had just this month had two workers disappear. Investigating them, he found only that they had left their homes and not come back. He also noted that this had recently delivered a statue to Rochester cathedral.
Around the end of January, there was a general meeting of the GD. There, Westcott announced the coming danger to all, and called for investigation and research.
We began with picking up to what happened to Shankley on February 18. Shankley woke up in a cheap apartment in Paris, where he found that he had no memory of the past nearly two months. He asked around and found that he had been living there for at least several weeks. He had some books with studies of primitive cave art, and philosophy. He also found a bloody knife among his possession in the lodging room, and a tattoo on his chest of a grotesque figure. Researching the image, he learned that it is of the type called "Sheela-na-gigs" in England. As he prepared to leave, he heard that MacGregor Mathers has been murdered in his Paris home. He then left all the more quickly for England.
Back in London, Coneybeare and Woodsworth took an interest in Rochester Cathedral after their investigation of the clay sites. Going out to visit, they met with Dean Bristol there. Though suspicious at first, he took them on a tour of the cathedral and grounds. They identified the statue made from the clay pits that Woodsworth had investigated, which was an outdoor statue of Christ at the center of a fountain. They also noticed an unusual number of cockroaches gathering in the cracks around the fountain. When they brought this up to the Dean, he brushed it off. While standing by the statue, Coneybeare had a vision of Christ strung up on a tree, but then the scene shifted and it was no longer Christ, and a vast serpent sprang up and snapped at him.
They stayed in Rochester that evening at a hotel, and during the night slipped onto the cathedral grounds over a low wall to investigate the statue. They at first intended to get a core sample of it, wondering if perhaps there was a body within it. However, as they were approaching it, Woodsworth was tackled from behind by Bristol, enraged. He grabbed Woodsworth and his hands seemed on fire. Despite the shock of this, the two overpowered him at first. He then turned to the statue and bent to pray. With him praying, Coneybeare and Woodsworth pummeled him further, and he lost consciousness. However, they then saw the statue of Christ itself begin to move. Both fled in terror and escaped over the wall. They hid for a time and returned to London by the first train (?).
The following morning, Dr. Norton went to work unaware of the events of the night. There he shortly encountered Dean Bristol, who came into his office to discuss a matter. Coneybeare and Woodsworth found later that Norton was beaten unconscious. Orderlies had stopped Bristol outside the cell of Dr. Fotheringay-Phipps, and had somehow accidentally lit himself on fire trying to burn the cell. They doused him using a fire hose and he ran off.
The same day, they encountered Shankley returned to London. He explained some about what he went through, and they updated him on the problem. They also spoke with Inspector Craig, and he said that he had arranged a meeting for Shankley with a contact of his, a Madame Constantine. He suggested that she was a priestess of some sort.
Determined to directly confront the problem, they obtained some dynamite during the day, and hired a carriage to go out to Rochester, taking with a shotgun and pistol. Late at night, they approached the cathedral and circled it. Through the front, they saw Dean Bristol sneaking about the grounds, taking a ladder along with a hammer and chisel. He climbed up the ladder towards a point on the front of the cathedral. As he took out his tools, the three stole up and knocked down his ladder, stunning and capturing him. At gunpoint, they walked him back to his office where they began to search his room. While they were searching, they heard the sound of thunderous footsteps. They barricaded the door, but soon the Christ golem was smashing it down. As this was happening, Bristol raved about his god, making clear that he had summoned it, and when he tried to escape out the window, Woodsworth shot him in the head.
The three considered escaping through the second-story windows, but looking at the creatures eyes as it was breaking in, Shankley went blank and began to fire his pistol at it with a glazed look in his eyes. He shot holes through its hands. As it burst in, the shotgun blasts took off pieces of the statue, and it began to resemble only half Christ and half some lizard-like figure. They were lucky in dodging the creature, and after several more shots, it collapsed and melted into the texture of soft, unfired clay.
In the silence that followed, they heard the sound of police whistles outside. Woodsworth and Coneybeare fled, but as he was escaping, Coneybeare realized that Shankley was still in shock in the room. Coneybeare then went back to get him out, but the two were captured by the police as Woodsworth slipped away.
The session began right at the end of the last one, late in the night of Friday, February 23rd. Woodsworth watched the police converge on the cathedral, and slipped away riding a rented carriage back to London. During this time, Coneybeare and Shankley were caught in the hallway outside of the Dean's office. Coneybeare immediately cooperated with the police, with a vague story that the Dean was mad. He handed his and Shankley's pistols to the officer.
Upon arriving in London a few hours later in the early morning of Saturday, Woodsworth's first action is to go to Scotland Yard to visit Inspector Craig. He tells him most of what was going on, specifically mentioning the statue of Jesus. Craig says that this puts him in a very difficult position, and says that he would try to help but couldn't make any promises. Returning home, he was planning about how to break into Coneybeare's and Shankley's flats -- but unfortunately was lacking the means. While there, Westcott visited him. As a coroner, Westcott had heard through police contacts about the arrest, and was panicked that the Golden Dawn would be connected to the Dean's death. However, neither knew how to do that.
They went to see Dr. Norton, who was recovering in the hospital. As his doctor, he had a key to Coneybeare's flat. However, as they got there, they found the police were already searching it. They slipped away without being noticed.
Back in Rochester, after only two hours in a cell at the Rochester police station, Coneybeare had been questioned by the chief of police, who let slip that Shankley had somehow disappeared from his cell. (The players no doubt attributed this to his use of an Astral Gateway, though that was not confirmed). He languished in his cell until the afternoon when his solicitor(s) arrived.
That evening, scheduled from earlier in the week via Inspector Craig, Woodsworth had a dinner meeting with Madam Constantine, to which he invited Dr. Norton as well. Constantine turned out to be a richly-dressed, but not by accent an upper-class woman. They later inferred that she is actually the proprietor of a brothel. She reported that she had some magical resources which could be used against the wyrm, but it would take her several more weeks to gather them. They questioned each other's sincerity, though, if they were to work together in rituals. She worshipped "the goddess", whom she said was eternal and stood for womanly values: nurturing all life, the raising of young, peace, and the preservation of forests and other natural resources. Asking their values, Norton said he was only nominally "C of E", but that he believed in logical materialism. Constantine offered to mail him some books to represent her view, and he promised to read them. [....Woodsworth's view?....] Concluding, Woodsworth arranged a meeting between Madam Constantine and the GD for the following week.
Later in the night, there was an emergency meeting of the upper echelon of the Golden Dawn was called -- including the Inner Order (Westcott, Farr, Berridge, Yeats) as well as other relevant parties including Woodsworth, Hardewick, and Northcote -- but missing Coneybeare and Shankley. With Mathers dead and grave dangers ahead, Dr. Westcott took charge of the meeting. At first, he made the strong announcement that the Isis-Urania temple was no more. The danger of a crackdown from the death of Dean Bristol was too great, he felt. Woodsworth made a speech that the temple would be needed in the coming months to save all of England. However, he brought up bringing in a "priestess" for this, which Berridge and Northcote immediately mocked, asking what sort of qualification she had. In the end, Westcott was respected as leader, but he was convinced that a new temple would be formed in secret, with a select list of members that he would vet from the existing temple.
Over the following days, Norton and Woodsworth were both questioned by the police. Visiting him at the asylum on Monday, the police also asked to talk to Dr. Fotheringay-Phipps, since the Dean had evidently attacked him. Norton cited his rights as the patient's doctor, and demanded that they get a warrant. They left in a huff, and Norton immediately sent for Woodsworth to help administer the Liao drug in order to prevent Phipps from talking to the police.
As they entered his cell, Fotheringay-Phipps could tell that something was up, and he tried to bargain with them. Clearly rather desperate, he said that he knew things about the reptiles prior to the Age of Man which were threatening. They weren't part of the fossil record because they had developed adaptations beyond the simple, inflexible bone structure. He said they dwelt in the coastal areas, and hated the cold. He said they especially disliked the forests, especially because of camouflaged predators there.
Norton: What do these predators look like?All of these statements were somewhat suspect, though, since he was clearly trying to say what he thought they wanted to hear.
Phipps: (pause) Trees! I mean, I said they were camouflaged.
Coneybeare, meanwhile, had talked to both his own solicitor and Albert Hardewick -- a GD member who hired Randolph Northcote in his office, who accompanied him to talk with Coneybeare. They both wanted his help, and Northcote tantalizingly reported that there was "great news" regarding his search for King Arthur. Hardewick had evidently had a vision regarding his freedom, and knew somehow that someone named Anstaria could help him -- but he didn't know the details.
On the night of Thursday, March 1, Coneybeare was awakened in his cell by Florence Farr -- who had mysteriously appeared there, no doubt through an astral gateway. He understood what she is about, and she opened another portal and summoned Anstaria to there. Anstaria said that she was willing to help him if he fulfilled her previous request -- i.e. he took Nathan Hardewick to his birthplace, to a hill near his ancestral home. At that point, they would be even and he would have to bargain for any further help. Coneybeare did not simply want to escape from jail, however -- he wanted his name cleared. Anstaria suggested that if Dean Bristol himself were to speak on his behalf, it would help his case considerably. He agreed to do as she asks for this. She then stepped through the portal and walked out of cell. As she turned away from him, Coneybeare had a glimmer of understanding, and realized that she was physically embodied, but smaller than she appeared, and had slipped between the bars.
Anstaria then evidently appeared as Dean Edwin Bristol to others in the police station. There was a huge uproar lasting several hours. "Dean Bristol" came with the Chief of Police to Coneybeare's cell, and identified him as a harmless acquaintence. In the end, Coneybeare was released from custody as the charges about to be brought against him were clearly false, though a cloud of suspicion still hung over him.
So in the morning of the following day, Friday March 2nd, Coneybeare returned from Rochester to London. He was quietly welcomed back by GD members, and arranged a meeting with Hardewick and Northcote. At first, the news is Northcote's discovery, which he lays out with great enthusiasm. He traced details of Arthur's resting place at first -- and found a remarkable correspondence in the work of a 16th century painter, Melinda Pryce. He shows an decades-old draft of an art book about her work, and in particular her painting, "St. Michael's Chapel of the Wood".
After Northcote has finished presenting and leaves, Coneybeare speaks to Hardewick privately about his mission. Albert Hardewick says that his sister, Nathan's mother, was a fallen woman. Though he was not there at the time, she had given birth to Nathan out of wedlock -- and in depression following his birth she had killed herself. He said that he could understand meeting the father, but he wasn't sure what he would do if he met the man. However, he insisted that he come along, even if he did not go to the meeting.
The session began picking up with Shankley, who awoke to find himself
standing bodily in the astral plane, with no memory of what had
happened to him since he went insane fighting the Christ golem. He is
faced with a hideous frog-like thing, which was giving him orders.
Creature: "Now forget all of what happened and go to sleep."
Shankley: "Yes?"
Creature: "Close your eyes and stand still. You are getting sleepy."
Shankley: "What are you trying to do?"
Creature: "Damn. You're finally developing resistance."
The creature then speaks to him in a dismissive tone. Shankley realizes that his previous period of blackout was apparently following the orders of this creature, which calls itself Nevik. It is merely annoyed at having lost its tool, and orders him to go create a portal for it. When the order doesn't work, it offers to give him information. He asks how he could go back in time, and it tells him that he can find the tools to go back in time in a cave below London -- including a distance east from a tube station. They then go to Rochester cathedral, where Nevik wants him to complete the bargain by opening a portal in front of the cathedral. Shankley gets nervous, though, and refuses. Annoyed, the creature gives up on him, spitting a slime on him before hopping away. Shankley is paralyzed for a half hour, but recovers fully.
Coming to on the steps of Rochester cathedral, he then makes his way back to London, rejoins the others, and relates what he has been through. He finds it is Tuesday, 10 days since he disappeared from jail, and 4 days since Coneybeare was released. He is still wanted for eluding custody, but since the original charges were dropped, the pressure is minimal.
The following day is the scheduled meeting of the Golden Dawn with Marilyn Constantine. They meet, and the results are mostly what they would have suspected. Berridge is dismissive, but the others are not. Constantine reveals that she does not know what sort of spell could be done to repel the worm, but she knows where the information can be found -- in an underground temple to the Goddess beneath London. Shankley privately notes that her description matches with Nevik's description of the cave where his time travel could be found. They part with plans for further work and conferring.
Having made his promise to Anstaria, Coneybeare arranges to go with Albert Hardewick and his nephew Nathan to their country house in Brecknockshire, Wales. Shankley, Norton, and Woodsworth come along -- plus Hardewick's servant Thomas. On Friday, they go by train to the nearest major town of Abersyonan, then an hour's carriage ride to the village of Partrishow. Nathan is a peculiar lad, who talks very little and doesn't get along with most people. His uncle is in a dark mood, and also doesn't talk much. The village is at the foot of the Black Mountains in Wales. Roughly three-quarters of the residents speak Welsh, and one quarter speak no English. The villages have only a few hundred people, and are quite backwards.
The Hardewick estate is a boarded-up two-story house out in a remote valley by the town, with a barn for sheep and many surrounding trails. By the time they arrive with the carriage, it is past dark and drizzling rain. Hardewick sends Thomas into the village to bring back some food, and Coneybeare requests that he get a live sheep as well. He privately plans to sacrifice it to summon the ghost of Nathan's mother Clarissa, who is buried in a family plot nearby.
After dinner and everyone goes to bed, Coneybeare and the others quietly slip out to go with the sheep to the family plot. Once there, Coneybeare sacrifices the sheep to summon the ghost of Clarissa. From his two questions, she reveals that she was attacked and raped by a gang of horrible creatures in the woods, and would prefer her son dead than to go back to those things. Coneybeare falls unconscious from the strain, and the others take him back.
Once inside, though, they realize that Albert has gone out with a shotgun. They try to follow his trail in the dead of night, and realize he is headed to the hill where they were to take Nathan. They eventually catch up with him and convince him to return.
During the next day, as they fix up the country house to stay in, several of the guests get the feeling of being watched. In the afternoon, they find that Nathan has wandered away for a time, and find him by a brook, talking to a girl from a neighboring farm. The girl, Helen, is looking around for wandered sheep. The others notice, though, that Nathan is speaking much more animatedly -- chatting openly with both her and them. They watch the girl suspiciously and she leaves.
That night as they are preparing for bed, the guests are startled by a rock thrown through a downstairs window. They rush downstairs with guns to see small forms quickly dart away from the window. Anstaria's voice calls out to them, demanding that they give over the boy. Coneybeare stalls, saying that he was going to take him out there. Pressed, he further threatens that they will shoot Nathan if they try anything. The creatures then try an attack, leaping through the window to hit with stone-headed clubs. They are short, hideous vaguely human creatures with dark snake-like dark and peeling skin. There is a brief melee where by accident, a stray shot from Shankley hits Nathan across the room. The little people withdraw then, and eventually the others hold them off for the rest of the night.
The following day, they go armed out to the hill with Nathan. Coneybeare's plan is to banish them from the region using the Crux Ansata. They are careful and all the others keep their guns ready. However, the ritual works and it seems afterwards that they have fled. Searching the hill, they find it riddled with caves. They find within them piles of sheep bones mixed with human and subhuman bones, along with primitive tools and ghastly cave art.
The session ends with all of them on the train the next day returning to London.
The session began with the investigators returning by train from Wales. Arriving in London, they proceeded with plans to find the cave temple they had heard about. According to the directions, the temple is located roughly underneath Whitehall -- a center of government buildings and the site for a small palace. (This is possibly a retcon from the previous session.) Coneybeare looks up on the history of early London temples, finding none known in that area (which was outside of the Roman city). However, he realizes that there was a Mithraic temple whose location would be a secret. Norton queries his contacts, and realizes that a former patient works in the city planning board, and would know about the surveys done of underground areas. The temple is best accessed from the Tyburn river -- which was once above-ground but was bricked over centuries ago and used as a sewer. It is accessible from a number of points, though not from Whitehall itself, naturally.
Coneybeare, Norton, and Shankley go into the sewers late on a Friday night. Woodsworth, however, has been held up by his work and cannot make it. The three take a small coracle for getting across the Tyburn and well stocked with supplies. They are taking picks and shovels as well as guns, but no dynamite. Off of the sewer channel in roughly the area, they find the ruins of a Roman baths -- low buildings partially collapsed but connected to the river and dug into the centuries-old ground. Searching through these, they find a tunnel which was once hidden by the walls of the baths. The tunnels are blocked, and they spend many hours amateurishly digging through it. At one point, Shankley is caught in a small collapse. (He takes minor damage.) They eventually break through to the chamber.
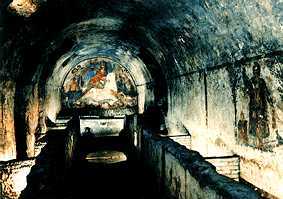
The temple began with a small entry room with a bas relief of a tree, which on close inspection showed the faint outline of a lion-headed man within the texture of the tree. This suggests that the temple was a Mithraic temple rededicated to some other purpose. The entryway was followed by a long rectangular chamber, roughly 75 feet long by 30 feet wide with a vaulted ceiling. An aisle ran lengthwise down the center of the temple, with a stone bench on either side three feet high. This fit with the pattern of other Mithraic temples:
 |
 |
On the benches, they discover a copper-inlaid stone carving of a bull's head. They also find a metal box, which upon inspection is steel with glass panes, and holds inside the perfectly preserved head of a dark-haired caucasian boy. They jump back in alarm when after a minute the head begins to move. They soon realize it cannot hear or form audible words, and it seems to only be trying to scream "Help, help". Disturbed, they search further.
They find bronze plates pressed with intricate symbols on a stone altar at the head of the room. The book is in an indecipherable script resembling Ogham, the druidic runic markings. Inspecting closely, they find that there is a slate stone beneath it, and underneath it is a complex, super-modern mechanism. It is too heavy to pull out, and extends deep into a hole within the altar. They also realize that the book and machine do not have the same layers of dust that the rest of the temple does. There is also a modern tunnel which breaks into the temple from the end by the altar.
For 2 to 3 hours, they experiment with the device, which presents them with what modern people would recognize as a view of Earth from space. They eventually discover that it can zoom in to the point of seeing buildings, as well as show different layers and wavelengths. Other buttons do not have an obvious effect. They keep the view centered on London for the most part, but after a time the clouds over London become impenetrable.
Meanwhile, Dr. Norton has found a way to open the box and can see what might be limpet-like buttons in the back of the box, under the viscous formaldehyde-like liquid. He sticks his hand in and presses some, but this seems to cut off the life support to the head, which appears to fall unconscious. He quickly tries to press some other buttons and restores the prior state.
The three then inspect up the modern tunnel. However, after a few hundred feet they encounter a stout iron gate set into the stone with a massive padlock. Unable to break it, Coneybeare and Shankley decide to scout ahead by using the Aether Portal ritual to step into the astral plane. Shankley begins the ritual, which takes an hour. Norton gives the head-box to Coneybeare to take with him, but stays behind to keep watch.
The ritual completed, Coneybeare and Shankley proceed on through the tunnel, eventually finding a secret entrance into the basement of a building in Whitehall. However, they could not tell who had used it. They step through into the physical plane for a minute to inspect the area of the entrance, but the only clue they can find as to who uses the tunnel is a dropped hat with the initials "M.H." on it. As they return, the head seems to have adjusted and within the astral plane is able to speak to Coneybeare in Latin. The boy, at first thinking that he is in some afterlife, says that he is the son of a Roman centurion within Britain. He was sacrificed and his head presented as a gift to the goddess as a lesson to his father, who had opposed the conversion from Mithras. He further describes that it was inhuman, buzzing creatures that sacrificed him, with wings and many limbs with pincers. Coneybeare agrees to let him pass on in the end.
When they get back to the temple, they decide to investigate below the temple in the astral plane, trying to perceive what the machine connects to below. As they descend, they seem the machine extends some ten or twelve feet down. However, they then hear a distant whistling as if a great wind was below them. Curious, they look down and see an amorphous form rising, appearing like a jellyfish until an enormous human-like eyes turns on it to look up at them, and they can see other limbs with claws. Suddenly in a panic, they try to rise up and shift into the physical plane. As they are doing so, though, a terrible force slams into them, feeling like a nearly solid wind. They make it through into the physical plane, but they are thrown into the vaulted ceiling of the temple and collapse on the floor. Shankley is dead -- his neck broken. Coneybeare is hurt but able to move. The box is broken open and the head fallen out.
Norton briefly treats Coneybeare, but when they see dust swirls begin to rise in the room, they retreat in a hurry, carrying Shankley's body with them. Eventually they make their way back to the surface where it is well into day. However, all is dark as London is in the grip of a tremendous storm. They take shelter in a nearby building with a story about a fall which Shankley took, and wait for the police and the coroner to come.
The session began with the investigators carrying Shankley's body out of the sewers. Though it is afternoon, it is dark outside with the wind howling and the clouds thick overhead. They send someone to telegram for Woodsworth as coroner, and he eventually makes his way there through the weather. Over Shankley's body, they tell Dr. Woodsworth about the temple and the machine they found, and discuss its implications. They fear that they may have cause the great storm, but don't know how.
Over the next few days, they lay their plans. Coneybeare buries the head of the Roman boy they found in some private ground, earmarked for talking to the ghost later. Woodsworth talks to Inspector Craig about their findings, asking to help discover the identity of "M.H.", and adds in a word of warning about the goddess based on the boy sacrificed apparently by monsters. Craig is standoffish about investigating anything to do with the Foreign Office, which is well outside his authority. He says he will look into it, however. He is also skeptical about Woodsworth's warnings that the goddess might be bad -- noting that all religions have some sort of dark history, and that the testimony of a severed head may be confused. However, Woodsworth recalls that Craig was the one who had hooked them up to Marilyn Constantine originally.
Dr. Norton (?) takes the bronze tablets to Yeats, imagining that as a scholarly sort with many Irish/Celtic connections that he will know people who can translate them. He asks about their origin, naturally, and asks for permission to take copies of the writing to Constantine -- whom he thinks will have useful information about the context of the writing.
Coneybeare also meets with Hardewick, his nephew Nathan, and Northcote. They reveal that their plans are all laid to attempt to find King Arthur. They plan to travel to the North, and stay in a little town called Beck's Green while they search for St. Michael's Chapel of the Wood. They have taken off time for two weeks for the task, and plan to leave on Friday.
As it turns out, Friday morning is set for Shankley's funeral. His friends all somberly attend, then head out to the train station where their bags are waiting. They reach the city of Helmsdon that day and stay overnight. The following day they travel by carriage out to Beck's Green. Asking around for local gossip, they hear conflicting reports about the chapel, which is a little-known site. There are a number of people who supposedly know the woods who deny that the chapel exists. Eventually, they settle on an elderly local doctor (?) -- who has supposedly been there -- as their guide.
They head into the woods on Sunday afternoon with their guide. Woodsworth and Norton both curiously become separated from the others and lost on the way there. However, Coneybeare along with Northcote and the Hardewicks get to the chapel. They fire off a shot and eventually find each other and all arrive at the chapel. It is a drab stone building that clearly dates to the early medieval -- though it has been maintained at some points since then. There are four stone benches as pews, and a nave in front with a simple stone cross. Nathan Hardewick notices an odd marking on an enormous oak tree near the chapel, in the shape of an ankh (aka the crux ansata). It has grown with the tree and shows only as a curiously-shaped line or knot. Circling the chapel, they find five of these trees with similar markings.
After considerable searching, they eventually find that there is a tunnel underneath the nave. They find a small crypt below which has a single crude sarcophagus. It is unadorned, with no markings or clues to suggest who or what is inside. With great trepidation, they open it up and find that it is filled to the rim with a spongy, fibrous substance. Chipping off a piece and bringing it up to the surface, Dr. Woodsworth concludes that it is calcified hair.
They carefully chip away the spongy material and eventually uncover a perfectly-preserved body of a Celtic man seemingly in his early forties. His hair merges into the spongy material that fills the coffin, and they trim it to free him. Taking him to the surface to examine, Dr. Norton finds that he is barely alive -- his heart beating once a minute and his breathing imperceptible. He was dressed as an ancient war leader, with an iron spear and bronze armor, and a crude marking on the inside of the sarcophagus lid said simply "Arthur, son of Aiden". Examining him more closely, they see a number of scars including what would almost certainly be mortal wounds -- chest scars matched on his back, for example. Dr. Woodsworth notes that some were healed at different times than others, rather than a single catastrophic attack which he recovered from.
Unable to find a medical cause for either his life or his coma, they prepare a stretcher to carry him away. However, a short distance from the chapel, he suddenly bursts into activity, screaming hoarsely and grasping at Northcote who was carrying him, and bleeding from the nose. They quickly bring him back to the chapel and find that he recovers. Coneybeare notes that his fit came just as they were walking past the ankh-marked trees. Based on his reading of Prynn, he has a sudden insight that there is some mysterious process within the body that the ankhs are suppressing that is maintaining his stasis.
Coneybeare becomes convinced that they would need to chop down the trees to bring him out of his coma. However, Dr. Norton is concerned that this would be an irrevocable decision which might kill him. As the day is growing late, they camp in the chapel itself to ponder it. After some time, Norton suggests that they very slowly attempt to edge him away from the trees to safely bring him out. However, in practice the fit comes on sharply. After two tries, they abandon the attempt. The next day they then begin to try to cut down the trees.
These are thousand-year oaks, and take considerable effort to bring down with the axes they have. However, after several hours of effort (primarily by Northcote and Hardewick), the first tree is brought down. Arthur's heart rate rises slightly and his chest moves slightly more visibly. They then proceed to chop down the other four, a task which takes them into the next day. During the night, the doctors keep watch over Arthur and his progress seems clear.
When the last tree is chopped down, he blinks into consciousness. He can speak in Old Gaelic or broken Latin. They explain that he has been asleep many years, giving a gentle explanation and noting that there is now a queen over all of England. Asking how to address him, he answers simply "Arthur" -- adding "I doubt that the titles I had in the past are in force any longer". He says that the last thing he remembers is being run through with a spear.
They have many questions for him, but do not press him out of consideration. lending him some modern clothes, they take him by stretcher back to Beck's Green. He answers that he did have a sister named Morgan, and an advisor named Myrrdin but described him simply as a wise man (though he did not strictly contradict Coneybeare's use of "wizard"). Over time, though, he grows cagey with some of his answers -- after noting in their reaction some consternation at some of his historical (i.e. barbaric) attitudes. He gives more neutral answers about subjects. He says that all gods are to be respected, including the Christ.
After a few days, they agree that he should stay in the country rather than the city -- but they would like to be close to London. The elder Hardewick returns by train to arrange for renting a country house. He and Northcote are ecstatic, and quite willing to bankrupt themselves to give proper room and board for Arthur. The others stay and help Arthur adjust, teaching him history and modern English. (They comment that he will be rather surprised at what some of the change in language implies.)
After the allotted two weeks in Beck's Green, he seems fit and the group all return to London by train. Arthur has naturally been prepared for this, and seems to be adjusting fairly well. He then goes with Hardewick and Northcote to stay at the house in the country.
Meanwhile, the others check up on what has gone on in the city. Yeats reports that he and Constantine have made progress on the writing in the tablets. The symbols appear to be a cipher for the sounds of some sort of Proto-Brythonic tongue. They have worked on what most of the symbols mean in sounds, but the meaning is still fragmented. The author is unknown, but the tablets have an invocation to the goddess. With great reverence and praise, the tablets announce a great gift to the goddess -- an eye in the heavens and its anchor on Earth. There are further writings, but they are not yet complete.
Inspector Craig reports to Woodsworth that he has found that "M.H." is one Malcolm Howard, an official within the Foreign Office with a non-descript job. He was formerly a writer of fiction and amateur astronomer. Now he has contacts in the Navy and makes regular trips to Oxford and Cambridge.
Coneybeare has received a letter from a bookseller in Germany, responding to his inquiries searching for a copy of the Latin original of De Vermiis Mysteriis. The bookseller says that he has a copy and the offer is quite acceptable, but he warns first that Leggett's English translation was edited for the moral content -- and that the original is rather shocking in its lewd and miscengenetic descriptions. Coneybeare naturally writes back to arrange the purchase, curious as to what the content could be.
Two days after getting back to London, Dr. Norton finds a letter on his desk with no address or signature. However, it includes a calculated astronomical position -- and suggests that he contact Malcolm Howard with this information. Norton cagily sends a letter to M.H. -- giving only the position and saying to meet him at his club.
Dr. Norton waits at the club, with the others eavesdropping incognito. A well-dressed man comes in and introduces himself as David Knightly. He explains that he works for the Foreign Office, and that Dr. Norton is intruding on matters that concern national security. Norton maintains that his note was simply a theoretical interest in planetary orbits, but Knightly is clearly suspicious. Norton actually recognizes Knightly, recalling something about his involvement in a Project Panopticon -- that was an obscure government project that had been attacked for its pseudo-science. He invites Norton to discuss the project at the Foreign Office.
We begin the session the day after Dr. Norton had his meeting with David Knightly. It is confirmed that Knightly invited Norton for two days from the meeting, on Wednesday. On Wednesday, Dr. Norton comes to the Foreign Office, bringing with him Dr. Woodsworth as a related colleague. They are both sworn to secrecy, and then introduced to Project Panopticon.
They are shown a complex apparatus of a chair with surrounding electromagnets and antennae. They meet Malcolm Howard, who talks extensively about his project here, that a person seated in the chair can supposedly draw maps based on radio signals picked up by the brain's pineal gland. They eventually draw out that he is the only one who can draw these maps well. They also meet his assistants, Bernard and Henry.
Norton at first mentions about the "machine in the basement", but when Howard ignores this, he sits through the further explanations. Afterwards, though, he talks with Mr. Knightly without Howard around. Norton bluntly tells Knightly that Howard is conning him, and that the data is actually coming from an ancient device located somewhere in the basement. Knightly is tentatively persuaded by Norton's story, and they proceed to look through the plans of Whitehall until Norton identifies what he thinks is the connecting basement.
There they eventually find a hidden door, and after Knightly picks the lock on the barred gates, they find the temple and its contents. Woodsworth is disturbed by hearing a distant whistling sound, but the others don't hear it. They find the machine and Norton instructs Knightly on the machine for an hour or so. They then leave back to Knightly's office, where he offers Norton and Woodsworth jobs at the Foreign Office, at £1000/year and £600/year, respectively (i.e. £200/year more than they are currently making). Norton and Woodsworth also go through Howard's office papers, and find correspondence with other pseudo-scientific sources including Dr. Berridge (an old enemy of Woodsworth's within the Golden Dawn).
That evening, Norton and Woodsworth along with Coneybeare and Nathan all visit the country house where Arthur is staying. There they discuss their plans. Arthur requests to speak with them alone. He sounds more decisive now, and he says that he is not yet sure of his plans, but he notes that it may be important to move soon -- since delay could result in worse things. They plan on breaking onto the site of the clay pits where Thursif has an influence, and collapsing the site down to prevent further spread of power.
The next day they attempt to buy dynamite. At first Woodsworth and Nathan have trouble, but Norton backs up Woodsworth's request and he gets the dynamite signed off on. Norton stops back at his home in the afternoon, when he is surprised by Malcolm Howard -- who broke into his flat and threatens him with a pistol. Convinced that Howard means to kill him anyway, Norton struggles with him for the gun but is shot twice and left for dead. The police close in, but do not catch him.
Coneybeare and Nathan then proceed to Howard's small but fashionable home. It is being watched by the police, but they slip around the back and force their way past the servant -- pointing out the watching police to him. Going into his study, Coneybeare finds a sheaf of papers under a loose board which have letters between Howard and Janice Bayldon -- i.e. the maid at the Pellgraine's home and twin sister of Joan Bayldon who was pursued by the hound. As they are walking away with these, they are accosted by the police. However, the policeman inexplicably addresses Nathan as his superior and they walk off. Nathan explains that he seems to be developing the talent which Anstaria had of making people see him as what he suggests.
After visiting Dr. Norton at the hospital, Woodsworth then stakes out the house of Dr. Berridge and finds that Howard is hiding out there. After a while of watching, Berridge goes out on an errand. Woodsworth then goes to the front door and knocks loudly, then after there is no answer proceeds around the back. Howard then runs out the front door. Woodsworth chases him down, and struggles with him, but narrowly escapes being shot and loses him on the streets. However, the sound of the gunshots brings the police and Howard is caught several blocks away and brought to jail.
The same night, Coneybeare and Nathan go to visit the address given for Janice Bayldon -- which they believe is a fashionable brothel run by Madam Constantine. The address turns out to be a non-descript brick building on the edge of a business district, appearing to be a private club of some sort, whose sign reads "The Convent". Constantine welcomes them and they discuss the discoveries they have made. She says that Janice left her employ to work for Pellgraine, apparently given a better offer. However, Janice's letters probably were most likely destroyed in the fire. They stay on for a party of some sort, and Nathan takes Constantine up on an offer of service.
In the morning post on Friday, Coneybeare receives a package -- the original volume of Prynn's De Vermiis Mysteriis. He eagerly tears into it immediately, skimming over to look for the changes. He soon finds to his chagrin that it speaks of the ankh as a symbol of fertile creative power, the predecessor of the Venus symbol. The author writes that the magical process of creating the ankh slowly turned him into a hermaphrodite, and a horrified Coneybeare examined himself to find that he was also in the process of changing.
We begin the session during Friday while Coneybeare is reading the original volume of Prynn, and discovering with shock changes in his anatomy. Meanwhile, the others regrouped to consider the state of their plans given that Dr. Norton had been shot. During the day, Norton received a visit from Arthur at the hospital, who expressed his deep concern that this had happened and vowed vengeance. He noted that Norton was a healer, and that the fighting should be in the hands of warriors. Norton sent him on to the meeting which the others were having at 8PM at Woodsworth's club. Arthur met Woodsworth and Nathan there, with Coneybeare arriving late -- still flustered over his discovery but saying nothing to them.
They agreed to proceed ahead with the plan of breaking into the clay pits. The pits in question are on the South side of the Thames out near Greenwich. It is an isolated spot with a 10-foot wooden fence around it. They have rented a carriage, and Nathan manages to pick the lock on the gate. Inside there is a small wood building with equipment and an office, along with the four pits in the ground, roughly 20 feet deep and 30 feet across. They have slanted ladder/stairs going down into them from a wooden platform on top.
Driving their carriage inside the gate, they first broke into the building and went through the papers in the office. Woodsworth had done research on the pits a few months ago, but since then the problems seem to be getting worse. In the past three months, there has been a complete turnover in the employees including a new manager. They copy down notes on all of the past and present employees as well as the major shipments -- which are primarily to local brick and tile areas.
The group then proceeds into the pits to place the dynamite to collapse them. None of them are too familiar with the procedure, but they have done a few tests with fuses and read a book of safety instructions. As they are inside the first pit, though, Nathan shines a light on the clay and sees a reptilian face form in the clay. He cries out and starts to light a short fuse on the dynamite he is carrying. As he is doing that, it hisses at him and then starts to grow into the giant figure of a serpent rising from the clay. Woodsworth fires his shotgun at it, and Nathan tosses the dynamite with lit fuse at its base as they all clamber to get out. As Coneybeare is going up, though, the serpent grabs the ladder in its mouth (?) and tears it loose from it's moorings in the wall. Coneybeare runs up a few more steps towards the thing's head, then leaps clear to the edge of the pit. The others are trapped below and try to find what cover there is as the dynamite goes off.
The explosion then goes off, which ripped the serpent apart but also stunned everyone and covered them in clay. Coneybeare tried to hang on, but slipped and fell back into the pit. Woodsworth was slammed against the pit wall by the force and fell unconscious, and tragically choked on blood and clay as the others tried to save him -- but lacked any medical training. An experienced climber, Coneybeare climbed out and brought over a ladder for the others, but it was too late for Woodsworth. They then quickly tossed dynamite into the other pits without placing it on the walls and drove out. Quickly driving past police, they took a circuitous route back to the Northcote's rented country house.
At the house, Arthur then asked to take the carriage out with Woodsworth's body, and the others agreed. They collapsed tired and demoralized. Meanwhile, a few hours later, Woodsworth awoke within a large basement coughing up blood and clay. He found that he had no heartbeat, but Arthur was standing over him and robed figures were filing out. Arthur explained that he had died but been given a healing draught that would keep him active from several weeks to several months. He discovered he had no pulse. Arthur explained that these were unusual times, and asked to consider giving his allegiance.
Woodsworth asks to think about. Just a little later on that day (Saturday, April 14th), though, he agrees to give Arthur his allegiance. The two then go out to the country estate. They are at first surprised and relieved that Woodsworth is alive. However, Arthur explains that Woodsworth is not strictly living anymore. Northcote's eyes go wide as he explains that he has invoked a secret process, and he whispers with reverence, "The Grail!"
Demoralized by what has happened and nursing wounds, the group rest for the weekend and into the week. In spare time, Woodsworth collects information about the clay pit workers whose records they pulled from the office. Out of 14, seven cannot be found (including the old manager), and seven are unemployed. The new manager, Jeremiah, seems vaguely shady and has been there for three weeks.
On Wednesday, the four go as a group to talk to some. The first is a Joseph MacTaggert. He treats them with suspicion, and asked whether they have come from a "him". They immediately go to another, Matthew Morrisey. To him, they claim that they have come from "him", and they talk as if they are in on something. Matthew has overt Anglican paraphernalia scattered about his place, and talks that he is part of a group which is organizing. He and others apparently believe that a day of ascension is coming soon.
On Friday, there is another meeting of the Golden Dawn. There, Dr. Berridge suddenly makes a startling claim -- that he has all the secrets of the device in the underground Temple. However, he also demands that he be given sole power over membership of the GD before he will let them see any of it -- since he claims that there are unworthy persons within the ranks. However, he is rejected by the group and walks off in a huff. Still pondering this, Northcote decides that this is a good time to reveal the secret of Arthur to the Inner Circle. (End of episode)
The morning after the GD meeting, Dr. Norton again finds a note on his desk in the mirror image of his own handwriting. In crisp, scientific terms it describes the estimated attributes of the worm-like lloigor which would rise. It suggests that it is capable of mental domination of ten to eighteen people, but that it also has some sort of physical form which is lying dormant beneath the Earth. The note cites comparisons to the hibernation of various serpent species. It concludes by suggesting that the creature could be eliminated permanently by waking it abruptly with a sudden increase in temperature. The note suggests that it would arise physically from the ground confused, and that it could then be killed by physical force. The note gives some estimates on physical size and doses of poison which would be called for.
The four meet to discuss this as well as what to do about Berridge. They try a two-pronged approach where Coneybeare asks to meet with him to negotiate, and in the meantime Woodsworth and Nathan attempt to break into his home for clues to his information. In a meeeting over supper, Coneybeare is polite to Berridge, and he agrees to a plan to work together where Norton gets him access to the machine through the Foreign Office.
In the meantime, Nathan picks the lock on the back door of Berridge's house, and they search it thoroughly. Malcolm's bags are there, but they are neatly laid out with no sign of any notes. They then find a receipt for payment of a safety deposit box at a bank, dated to the day after Malcolm Howard was captured. Putting things back the way they found them, the two slip off.
Upon discussion of this, they consider various schemes to get the notes away from Berridge. However, they eventually agree to trust Berridge since it is in his interests to defeat Thursif as well. They plan to sneak him into the temple via the sewers on Monday night, since he insisted that he would not be ready until then -- they suspected because he needed to visit the bank.
On Sunday, Woodsworth as a now vassal of Arthur is called to a meeting. He finds to his surprise that there are over forty people who have met at a hired room at Club Autonomie where various expatriates tend to gather. They have all sworn allegiance to Arthur. With some mingling, he finds that about a third are Irish nationalists, a third are lower-class types with hints of criminal connections, and a third are more clean-cut middle class who seem more closely knit (perhaps a club or lodge). He is surprised to find Inspector Craig there. Arthur explains that he has promised to support home rule for the Irish, but says little about the others. They are disorganized and fractious, but all clearly respect Arthur. He leads setting up ranks and units, as well as plans for armament.
At a celebratory dinner afterwards, an Irishman stands up and declares "We kicked the dragons out of Ireland, and we can do the same to them in England." (The session took place on St. Patrick's day.)
At work on Monday, Norton finds that constant work has gone on. The temple has seen considerable traffic, and there are armed guards outside of the entrance now. Consulting with Knightly, he hears that the sewer entrance is also being watched. Concerned, he sends an oblique telegram to his friends to call off the plan.
They speak that evening at Norton's club to talk with Berridge and form a new plan. They also discuss about the option to jolt Thursif awake with a sudden rise in temperature. Coneybeare is against this plan, preferring the idea of a cold spell that might return Thursif to hibernation. However, Woodsworth and Nathan support Dr. Norton's concept -- and Berridge also agrees. Woodsworth mentions Arthur's forces, and they seem ideal for killing the risen Thursif.
On Tuesday evening, they all meet at the country house. There, they discuss their plans with Arthur. Arthur discusses about his forces, and hints that there are pagans within the city whom he contacted to recruit some of the people he did. Arthur agrees to prepare his forces to attack Thursif. They plan to do it soon, marshalling their forces within a week and then setting off the heat wave. (End Session)
Having agreed with Arthur, the group all go to Marilyn Constantine's brothel, "The Convent", to recruit her on their plans -- and tokenly to offer her a chance for input and advice on what they should do. Arthur accompanies them, and they find that Constantine already knows of Arthur. She at first addresses him as "Your Majesty", but he defers - saying that he is not a king yet.
Discussing with Constantine, they plan their strategy of attack. Constantine agrees that her cult can potentially help with magical rituals. Coneybeare reveals his ankh to him (Prynn's Crux Ansata), and both she and Arthur give a slight bow as he reveals it. She agrees that some of her people could help in a ritual lead by Coneybeare to attempt to drive Thursif into a trap. More importantly, she thinks that she has a potion which would make people immune to the mind-altering powers of the lloigor (as demonstrated on Dean Bristol and the clay cult). She says she needs a few days to test it on a volunteer among her people.
Returning to the country house, Nathan again tries to commune with nature, and this time he finds a reptilian psychic voice speaking to him. It identifies itself as "Karleff", and seems half-asleep, insulting him as a worthless half-breed -- but it also apparently has no love for Thursif, and tells him in archaic terms where it thinks Thursif rests.
Over the rest of the week, they prepare for the plan. Arthur and his men go off into the country to engage in maneuvers to drill in preparation for the fight. Dr. Norton points some contacts to Woodsworth to get access to the poison. Meanwhile, Dr. Norton finds that at work the project is receiving increasingly major attention from higher up in the government. Knightly is increasingly nervous, and convinces Norton to do a demonstration of the machine's power -- starting a storm over Marseilles on Friday (in reaction to clashes with the French over China). Nathan and Inspector Craig attempt to tail the leader of the clay cult, but he spots them and they resort to listing him to the police as a suspected terrorist to be watched. Meanwhile, Nathan researches where Karleff told him that Thursif could be found -- and with Coneybeare's help identifies the spot. Coneybeare sequesters himself to learn the spell "Summon Dark Young of Shub-Niggurath" from the Prynn volume -- thinking that one of them might aid the fight against the lloigor, based on what Fotheringay-Phipps said.
On Thursday, there is another emergency meeting of the GD where they recruit people to aid in their plan. Florence Farr begins to rave that they are all doomed, claiming that she has spoken to the spirits, and knows eternal, ethereal secrets. She points to Arthur as the one responsible. Dr. Westcott realizes that Woodsworth is now living dead, and becomes quite disturbed and yet also fascinated. Farr and Moina Mathers break from the group, but most of the others agree to help.
The plan is that on Sunday night, Arthur's men will secretly take out what members of the clay cult they know about. Then on Monday, Dr. Norton will bring Berridge into Whitehall to take him to the machine to initiate the heat wave. The strike on the clay cult is successful.
However, after clearing Berridge for access on Monday, Dr. Norton is accosted by Knightly for a surprise inspection. Queen Victoria herself comes to have a look at the project and speaks briefly with Dr. Norton. Knightly and he both breath a sigh of relief when she leaves, and he proceeds to take Berridge down to the machine. Knightly is concerned since he doesn't trust Berridge, but agrees. Berridge does indeed start the heat wave, following instructions from hand-copied notes undoubtedly taken from the prior project head Malcolm Howard.
During the day, Arthur asks Dr. Woodsworth for his expert aid as a coroner. He has a plan to use three of the living dead -- performing surgery on them to insert bombs inside their ribcages. He claims that they will be used against Thursif, particularly if Thursif tries to eat them. Woodsworth happily and easily performs the surgery, transforming the three into living dead bombs.
That evening, a dramatic heat wave strikes London, with the temperature rising over twenty degrees Fahrenheit. In the morning, Knightly immediately confronts Norton: "This is a disaster! I have taken Berridge in for questioning, but he has told us nothing -- he simply hissed at me!"
Norton is immediately concerned, and investigates. Berridge is indeed nearly mindless and acting like a lizzard. His home, investigated by the police (with Inspector Craig among them) showed signs of a struggle, but no forced entry. Norton then decides to check his own store of the Liao drug, and finds exactly the dose which was given to Billy gone -- i.e. the dose which would leave someone's mind permanently lost in the past, and them to slowly transform to a boneless abomination. Going back, this is confirmed by finding a needle mark on his along with the bruises of a strong hand holding him.
Norton is now being watched, and he is very careful when he alerts the others than something dangerous is happening. He now suspects his own mind of having done this.
Tuesday night, Coneybeare visits the Convent to tell them about what is happening. With him alone, Constantine reveals to him the secret of the potion -- she shows him a pearl-rimmed copper cup that she says is the basis of the Holy Grail, and also the Bran's life-restoring cauldron of Celtic myth. She explains that while the cup is special, the true power lies in what is put in it. She takes the cup to where there is a large box is suspended on chains, four times the size of a coffin. She pokes a sharp stick into a hole, and a creature within groans as a trickle of blood comes out that she catches in the cup. The blood changes color as it touches the pearls. She then brings the cup to a corpse on a table, and they force the cup's contents down its throat. Within minutes, the corpse comes to life. Coneybeare goes away disturbed and yet fascinated -- aware that somehow his condition is connected to the creature in the box.
The next morning, Dr. Norton receives another note from his other side. It suggests to burn the note for safety. It explains that the turmoil of the creatures rising will ultimately be to the benefit of themselves, England, and the cause of science. It estimates from its research that there are three creatures that will rise the following day -- and urges Norton to keep them both safe as turmoil grips the country. It follows that the increased militarization will be vital to the coming decades for England, and also makes some predictions about a possible new regime. It estimates a 45% chance of Arthur taking over, but only a 4% chance of the lloigor successfully establishing rule. Norton is horrified, and immediately sends a note to the country house where Arthur and his forces have marshalled.
In the meantime, however, the lloigor are already rising. Nathan wakes from a nightmare where he faced the rising Thursif, and immediately alerts Arthur in the early pre-dawn. He and two scouts go out to the site where they think Thursif will rise -- and they see a massive dragon-like creature emerge from the ground from a sinkhole on the hill. They stay back to wait for Arthur's forces.
However, Arthur's forces are strangely delayed. He receives the note from Norton that there will be three lloigor -- and he claims they have to wait for further information. Meanwhile, a set of British guard troops show up and cautiously approach the lloigor. The front line turn, mind-controlled, and fire on the men behind them and the unit flees panic stricken as the remainder shoot themselves. The lloigor then proceeds among the bodies to feast.
Woodsworth confronts Arthur, demanding that they go. He has had growing suspicions that he shared with Hardewick and Nathan -- having seen marks on Arthur's battle maps by Buckingham Palace and other sites in London, that Arthur dismissed as contingency plans. Confronted, though Arthur coldly explains that unless the true danger of the lloigor is made plain to the populace, then it might be mistaken for just some dangerous animal. He says that for him to be hailed as the new king, he needs to demonstrate extraordinary heroism. The turmoil and the extent of the danger need to be made plain for him to rise. When Woodsworth suggests that they won't crown him with a reigning queen, Arthur explains that the Queen will be eliminated by the perfect assassins -- the living dead bombs that Woodsworth himself helped make.
Enraged, Woodsworth tries to mask this and quietly walks by his shotgun. He fires on Arthur full in the chest with both barrels. A cry of alarm soon surfaces, and he quickly reloads. As men burst in from the other room, he fires again into Arthur to finish the job -- and soon is cut to pieces by Arthur's men.
With Arthur dead, the troops are in turmoil. Nathan returns to report, and convinces his uncle Albert to make a speech to the men to continue Arthur's mission. About half of the men then go with him to assault Thursif. They wound it with the strychnine, but it gets to the Thames where it thrashes below the surface under the poison's influence. Albert Hardewick volunteers to dive down after it taking a rope line with him and a hook. He ends up acting as bait, and the men with their horses eventually drag Thursif out by the line with Hardewick's limbs still hanging from its mouth. They then finish it off.
Coneybeare and Constantine then join them by the river, having been in a poor position to help. Hearing that Arthur was shot twice in the chest with a double-barreled shotgun, Constantine concludes that he must be wounded and plans to go to him. Nathan explains Arthur's treachery, and watching her, Coneybeare realizes that she knew all along about this. However, they don't stop her, reasoning that Arthur's plans have fallen through anyway since he cannot lead the defeat of the creatures.
The other two worms rose slightly later than Thursif, one southeast of Greenwich and one in Bloomsbury -- smack in the middle of London. From his office, Dr. Norton can hear the popping of gunfire, knowing that havoc and death are being wreaked blocks away. He goes to the machine to try to identify the exact positions of the creatures, and gives what information he can. He alerts Knightly's suspicions by how much he knows, but tries to cover it as insights from Berridge's ravings. Knightly also tells him that the Queen has been killed by an explosion.
Back by the east Thames, the survivors along with Coneybeare head to Greenwich to confront the creature there. As they approach, the lead carriage implodes into a mess of wood splinters and pulped flesh. Scattering, the men take shots at the lloigor, which flees among the houses there. Eventually, they trap it in a building and force it out with explosives. However, the men are devastated by the fight and only a handful remain.
Proceeding to London itself, all is chaos there. With belated warning from Dr. Norton, the army is staying back to avoid being controlled -- but there are plenty of people there to be controlled. Mortar fire on the urban area is useless and the creature makes its way south.
Coneybeare and the cultists make their way into St. James Park -- while the others go to tell the army to try to drive the lloigor there. Coneybeare finds a volunteer among the cultists to be sacrificed, and kills her to summon one of the Dark Young of Shub-Niggurath with orders to slay the lloigor. The Dark Young respects the cultists, but does eat a passer-by.
With luck on their side, the others do manage to drive the lloigor into the park. There the Dark Young finishes it off, then sinks back down into the ground.
With the blood on his hands and the horrors he has witnessed, Coneybeare is significantly unhinged. (He still had twenty-something SAN, but had lost 16.) He ends up joining the cult and being used for horrendous rituals, eventually being put in a box like the person he had seen earlier.
Woodsworth died a second time, this time satisfied that he had done some good.
Dr. Norton went on to a vital government position. Knightly remained suspicious of him, but his expertise was too vital to be ignored. He was no doubt plagued by guilt over having unwittingly caused much of this.
Nathan survived with his mind and body more-or-less intact, though having heard the call of his people, he might in later life again feel drawn to them.
Arthur no doubt survived his wounds, as they knew he could. However, with this plan gone, he would disappear into the North to plot another way to gain the throne.